There will be few setup steps we need to follow before we jump into the Kernel Exploitation:
Install Windows x86 in VM
- Install WinDBG
2. Setup the Debugging Symbols
- computer – properties – advanced system settings – emvironmental variables
- create a sys variable
- Variable Name: _NT_SYMBOL_PATH
- Variable Value: SRV*C:\Symbols*https://msdl.microsoft.com/download/symbols
3. Enable Debugging in BCD
Run CMD as administrator and type the followings
- bcdedit /copy {current} /d “Win7Dbg”
- bcdedit /debug {…………} on
- bcdedit /dbgsettings
4. Create the Debugee VM
- power of the debugger VM
- create a linked clone
5. Enable Serial Ports on Vmware
- go to Library, right click, press Option, edit the config file
Add Device – Serial Port
** note that I use VMware Fusion on my mac and you can edit the config file by clicking the Option key with right click in VMware library
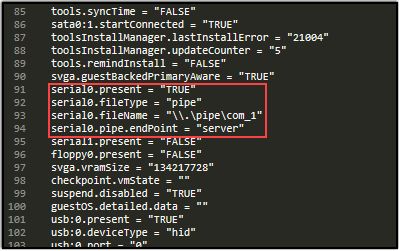
- serial0.present = “TRUE”
- serial0.fileType = “pipe”
- serial0.fileName = “/tmp/serial”
- serial0.pipe.endPoint = “server”
- serial0.present = “TRUE”
- serial0.fileType = “pipe”
- serial0.fileName = “/tmp/serial”
- serial0.pipe.endPoint = “client”
6. Start the Debugger Machine
Debugger machine – start normally (without the debugger mode)
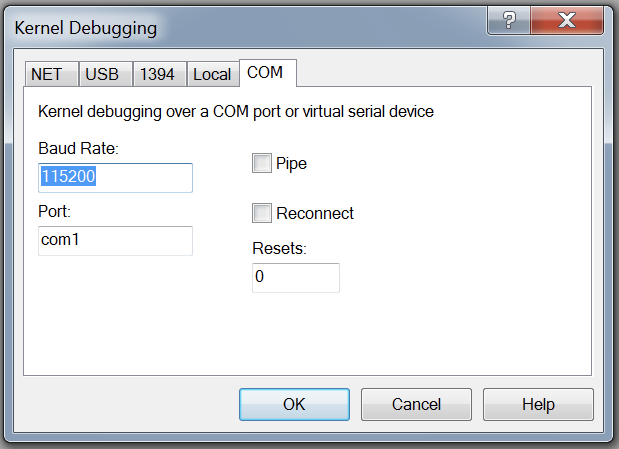
Go to WinDBG – File – kernel debug – COM
7. Start the Debuggee Machine
Choose Win7DBG – debugger enabled
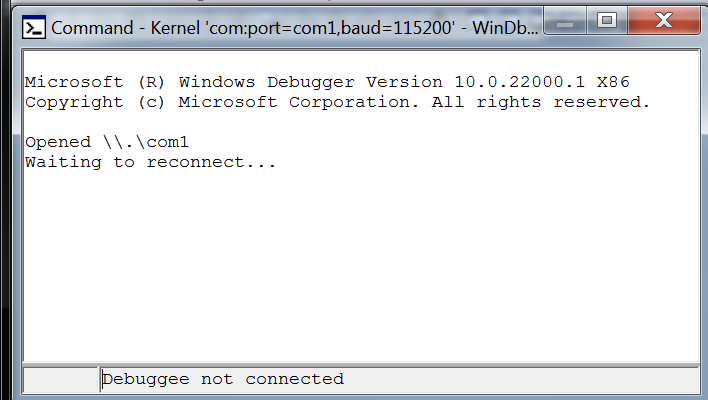
Check the debugger machine again for such screen
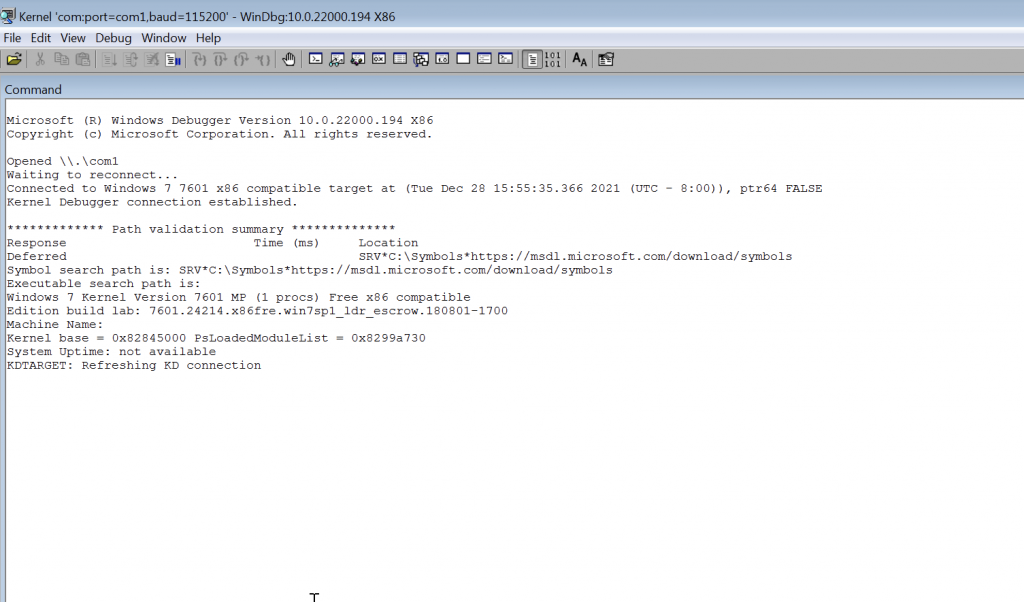
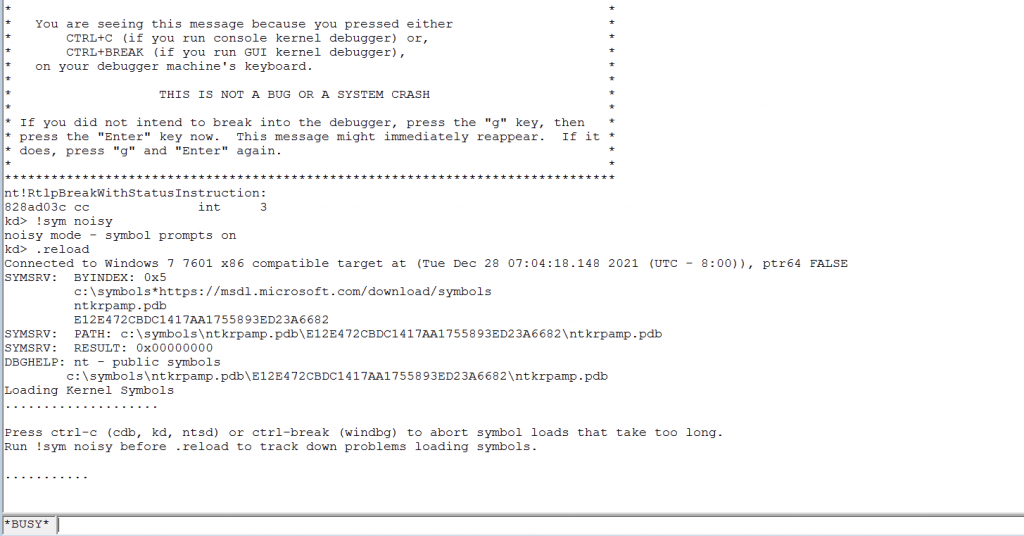
Hit Break button to get an interactive >kd prompt
let’s check if the symbols were loaded correctly:
!sym noisy
.reload
8. Download HEDV and OSR Driver Loader
Load the driver on debugee VM
• choose the driver path
• set Service start: Automatic
• Register Service
• Start Service
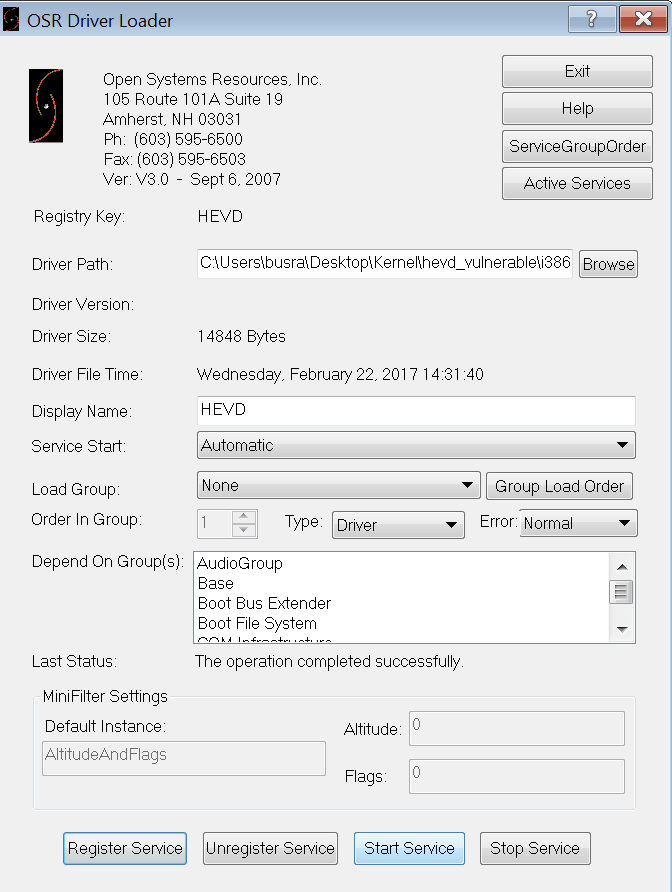
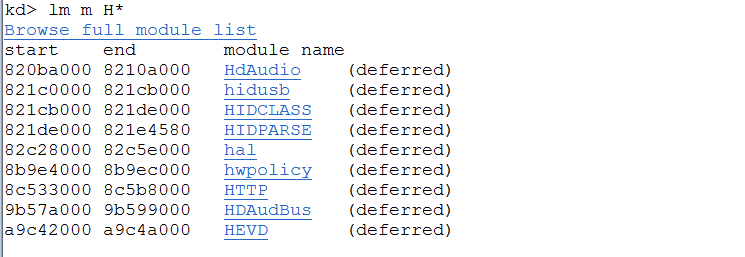
Check on the debugger machine to see if the driver is loaded
lm m H*